No products in the cart.


Journal
A Complete Beginner’s Guide to Die Cutting: Everything You Need to Know
There is something quietly magical about holding a piece of paper you cut yourself — the edges sharp, the shape precise, the possibilities endless. If you have been curious about die cutting but found the world of machines, sandwiches, and thin wafers a little intimidating, you are in exactly the right place.
This guide will walk you through everything a beginner needs to know: what metal dies actually are, how to use them without a hundred trial-and-error runs, and how to turn a plain sheet of paper into something worth keeping.
What Exactly Is a Metal Die?
A metal die (also called a cutting die or die cut) is a thin sheet of metal with sharp edges shaped into a design. When you run it through a die cutting machine with pressure, it slices cleanly through paper, cardstock, and other materials — like a cookie cutter, but with razor-sharp detail.
Die cutting is one of the most versatile techniques in paper crafting. With the right die, you can cut:
- Precise, intricate shapes every single time
- Layered, three-dimensional elements for cards and scrapbook pages
- Custom frames, borders, and window openings
- Letters, numbers, and sentiments
- Floral motifs, animals, seasonal shapes, and geometric patterns
And the best part? Once you own a die, you can use it hundreds — sometimes thousands — of times. It is one of the most cost-effective tools in the crafting world.
What You Need to Get Started
The good news: you do not need much to start die cutting. Here is your starter checklist:
1. A Die Cutting Machine
A manual machine is the most beginner-friendly option. Popular choices include the Sizzix Big Shot, Spellbinders Platinum, and We R Memory Keepers Evolution. Most standard thin metal dies work with all of these machines, so you are not locked into one brand.
2. Metal Dies
Start with versatile dies that cover multiple projects. Great beginner choices include:
- Nesting dies — multiple sizes of the same shape (circles, squares, tags)
- Border dies — decorative edges for cards and layouts
- Floral dies — the single most useful category for any crafter
- Seasonal shapes — stars, snowflakes, leaves, hearts

3. Cutting Materials
Cardstock is the go-to — it cuts cleanly and holds its shape beautifully. You can also use patterned paper, vellum, specialty papers, thin felt, and more. We carry a wide range of cardstock and specialty papers perfect for die cutting.
4. Basic Supplies
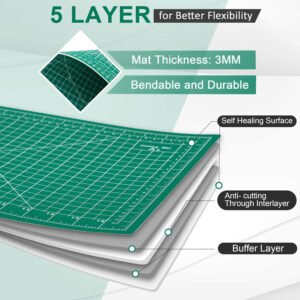
- Cutting plates (usually come with the machine)
- Wax paper or a silicone mat (helps release sticky dies)
- Foam tape and liquid glue for assembling
- Tweezers or a die pick tool for removing small pieces
The Step-by-Step Die Cutting Process
Step 1: Build the Sandwich
This is the part most beginners worry about — but it is simple once you know the order. From bottom to top:
- Bottom cutting plate (clear acrylic)
- Metal die — cutting edges facing UP (toward the paper)
- Your paper or cardstock
- Top cutting plate
Key rule: the die’s sharp edges always face the paper, never the plate. The flat side of the die goes down.
Step 2: Run It Through the Machine

Place your sandwich at the entrance of the machine and turn the handle steadily. Apply firm, even pressure — no need to force it. If it feels too tight to roll through, your sandwich is probably too thick. Remove one cutting plate and try again.
Once through, you will feel the difference when the die has cut cleanly. If it did not fully cut, run it through once more or add a shim (an extra sheet of cardstock) for more pressure.
Step 3: Release the Cut Piece
Carefully separate the cutting plates. Gently flex the die to release the shape — the cut piece should pop free. Use tweezers for tiny details or intricate cuts.
Pro tip: Do not throw away the “negative space” — the remaining paper with holes. It makes a beautiful stencil or layered background!
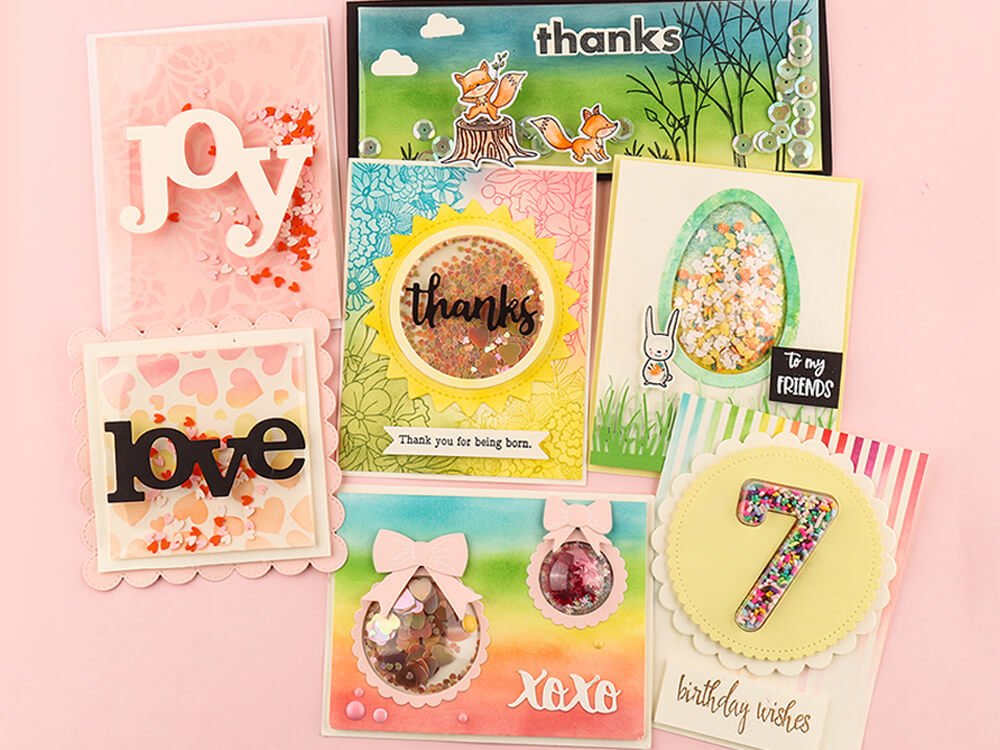
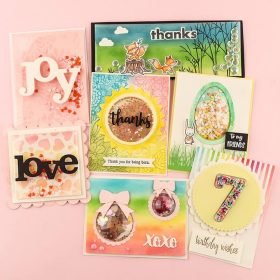
Creative Ways to Use Your Die Cuts
Layer for a 3D Effect

Cut the same die shape from two or three different colors, then offset them slightly and stack with foam tape between layers. A flat flower becomes a lush, dimensional bloom. This technique works on everything from roses to geometric frames.
Create Custom Cards
Use dies to cut your card base, window openings, or decorative focal points. A window card — where you cut an opening in the card front and layer patterned paper behind — is one of the most popular beginner card projects for a reason.
Make Professional Borders
Border dies instantly elevate a plain card. Run a decorative border die along the edge of a card panel for an elegant frame that looks like it took hours — but took minutes.
Embrace the Negative Space
The leftover paper after you cut out a shape is not trash. Use it as a stencil to ink or paint through, or layer it behind a contrasting color for a striking negative-space design.
Tips That Actually Make a Difference
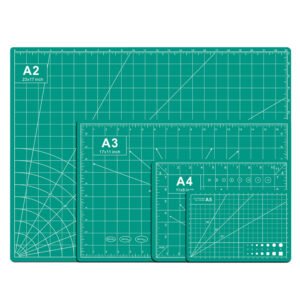
Choose the Right Paper Weight
- 65–80 lb: Light — great for intricate dies, but may need multiple passes
- 80–110 lb: The sweet spot — cuts cleanly with most dies
- 110+ lb: Heavy — fine for simple shapes, but too thick for detailed dies
Get Clean Cuts Every Time
- Keep dies clean — a soft brush removes paper fibres that can dull the edges
- Store dies flat to prevent bending
- For sticky dies, place wax paper between the die and the paper before running through
- Run complex dies through twice for the cleanest result
Store Dies Properly
Keep dies on magnetic sheets or in their original packaging. Label your storage so you can find the exact die you need without digging through everything. Trust us — this saves more frustration than you would expect.
Common Beginner Mistakes (and How to Fix Them)
Die not cutting all the way through
Most likely a pressure issue. Try running the sandwich through again, or add a shim (a thin piece of cardstock) between the plate and die to increase pressure. Also check that your cutting plates are not worn.
Pieces sticking to the die
Place a sheet of wax paper over the die before adding your paper. The wax coating helps the paper release cleanly after cutting.
Uneven or torn edges
Pressure is not distributed evenly. Make sure the die is centred on the plate with no overhang, and that the platform is clean — even tiny paper scraps cause uneven pressure.
Thin wafer dies bending
Store flat on a magnetic sheet at all times. Never stack heavy items on top of dies. And yes, the edges are sharp — handle with care.
What Materials Can You Cut?
Metal dies are more versatile than most people realise. Here is a quick reference:
- Cardstock — the classic choice; 80 lb is ideal
- Patterned paper — cuts cleanly without shims
- Vellum — use a shim; gorgeous for layering
- Specialty papers — foil, glitter, metallic; always test first
- Thin felt — back with freezer paper for cleaner cuts
- Fabric — stabilise with fusible web or starch first

Your First Die Cutting Projects
Easy beginner projects to try:
- Layered flowers — cut 2–3 sizes of the same floral die, offset and glue with foam tape for instant dimension
- Gift tags — cut a basic shape, add a sentiment, punch a hole, tie with ribbon
- Border cards — run a border die along the edge of a card panel for instant elegance
- Window cards — cut a shape in the card front, layer patterned paper behind
- Photo frames — nested circles or squares to frame photos on scrapbook pages
Frequently Asked Questions
Do I need a machine to use metal dies?
Yes — metal dies require the pressure of a die cutting machine to slice through materials. They cannot be cut by hand.
Are all metal dies compatible with all machines?
Most standard thin metal dies work with most manual die cutting machines. Check your machine’s specifications for maximum die size.
How many times can I use a metal die?
With proper care, metal dies can last for hundreds or even thousands of cuts. They are one of the best value tools in crafting.
What paper weight is best for die cutting?
65–80 lb cardstock for intricate dies; 80 lb is the everyday workhorse for most projects. Avoid anything heavier than 110 lb for fine-detail dies.
Can I use dies to make cards?
Absolutely — dies are one of the most popular tools in card making. Cut card fronts, decorative frames, sentiment panels, and layered embellishments. Border dies are especially useful for card edges.
Thin wafer dies vs. steel rule dies — what’s the difference?
Thin wafer dies (chemically etched) are thin metal sheets with sharp etched edges — lightweight, easy to store, and work with all major machines. Steel rule dies have a thick wooden or foam base with an embedded steel blade — more durable, can cut thicker materials, but bulkier and pricier. For card making and scrapbooking, thin wafer dies are the most popular choice.
Explore Our Die Collection


Ready to Start Die Cutting?
There has never been a better time to dive in. With the right dies and a little practice, you will be amazed at what you can create — cards that look professionally designed, scrapbook pages full of personal meaning, and gifts that people genuinely keep.
At Sumflying Craft, we carry a wide range of metal cutting dies covering every theme and style — from delicate florals and seasonal sets to bold alphabets, detailed frames, and background builders.
Browse our full die collection and find your next favourite cut:
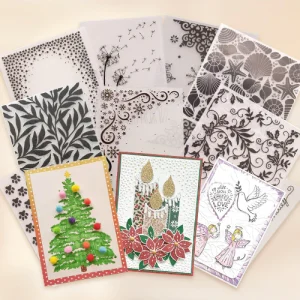
- Flower & Botanical Dies
- Border & Frame Dies
- Christmas Dies
- Easter & Seasonal Dies
- Alphabet & Word Dies
- Animal Dies
Happy cutting — and happy crafting!
 New Arrivals
 Best Sellers
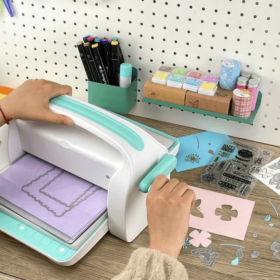 All Product
 Latest deals