
No products in the cart.


Journal
25 Creative Ways to Use Washi Tape: Ideas for Scrapbooking, Cards, Journals & More
Washi tape is one of the most versatile tools in any crafter’s collection. Made from Japanese rice paper, it’s lightweight, semi-transparent, repositionable, and available in an endless variety of colors and patterns. Whether you’re a seasoned scrapbooker or just getting started with journaling, this guide gives you 25 fresh ideas for putting your washi tape collection to creative use — from quick weeknight projects to showstopping layouts.
At SumFlying Craft, we carry hundreds of washi tape designs — from delicate botanical foils to bold holographic prints and kawaii character styles. Before we dive in, here’s a quick overview of what makes washi tape so special:
| Feature | Why It Matters |
|---|---|
| Repositionable adhesive | Peel and restick without tearing paper |
| Semi-transparent | Layer beautifully over photos and text |
| Tear by hand | No scissors needed for quick projects |
| Writable surface | Use a ballpoint or Micron pen right on top |
| Huge variety | Solid colors, florals, foil, holographic, characters and more |
Washi Tape in Scrapbooking
Scrapbooking is where washi tape truly shines. Its textures and patterns can elevate an ordinary layout to something that looks like it came out of a design studio.

1. Frame Your Photos
Use strips of washi tape on all four sides of a photo to create an instant decorative border. Alternate two complementary patterns for a layered, polished look. Floral or botanical tapes work especially well with nature and travel photos.
2. Build Page Borders & Dividers
A single run of washi tape along the edge of a scrapbook page can ground the entire layout visually. Use it as a spine-line down the left margin, or run it horizontally to separate a headline from a journaling block.
3. Anchor Die-Cuts & Embellishments
Instead of foam adhesive, use a small tab of washi tape to attach die-cuts in a way that’s slightly raised. The tape’s texture adds dimension and lets you reposition elements before committing.
4. Create a Striped Background
Lay strips of washi tape side by side across a blank piece of cardstock to build a custom striped background paper. Mix widths and densities for an organic, hand-crafted feel.
5. Title Banners
Apply a strip of a solid or subtly patterned washi tape behind letter stickers to create an eye-catching title banner. The tape acts as a visual foundation that makes lettering pop.
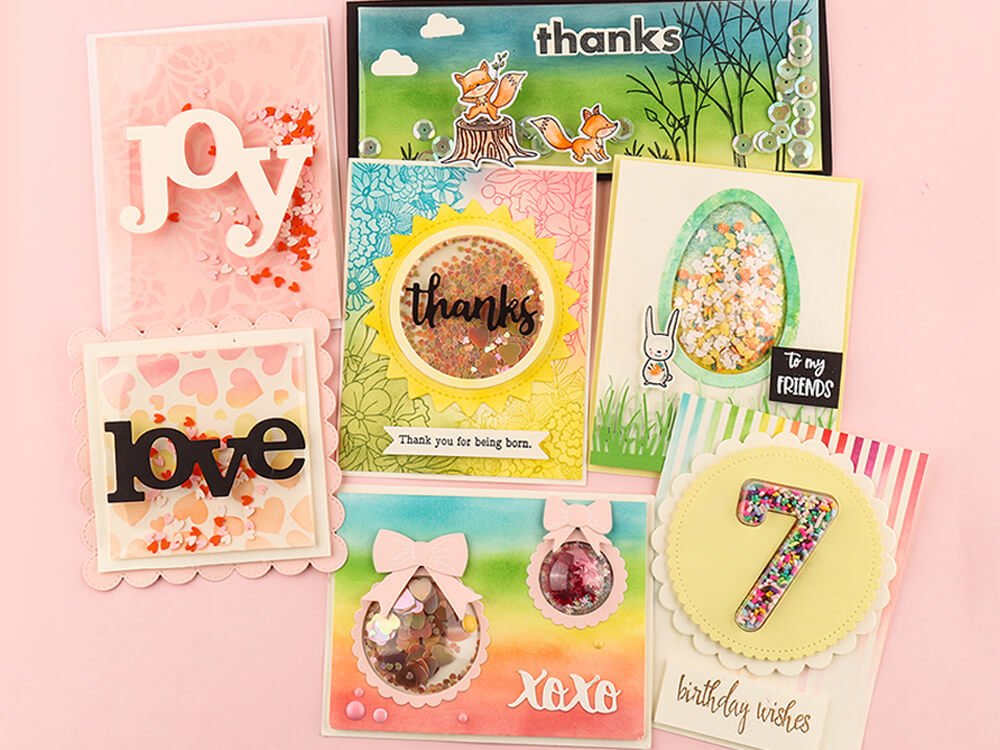
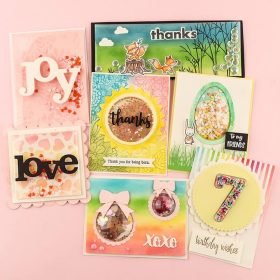
Washi Tape for Card Making
Greeting cards are one of the fastest and most satisfying projects to make with washi tape. A few strips can transform a blank card base into something truly special in under ten minutes.

6. Striped Card Panels
Cover a card panel with parallel horizontal or vertical strips of coordinating washi tapes. Trim flush to the edges and adhere to your card base for a clean, modern look. Foil and glitter tapes add extra sparkle for celebration cards.
7. Mini Bunting & Pennant Flags
Fold short pieces of washi tape over a length of baker’s twine, then trim into triangles. String the pennants across a card front or gift tag for instant party charm.
8. Birthday Candles
Cut 4–5 short vertical strips of brightly patterned tape and arrange them on a card to look like birthday candles. Add small yellow flame shapes cut from a contrasting tape or card stock to complete the scene.
9. Washi Tape Flowers
Tear small oval-shaped pieces of tape and overlap them in a circular arrangement to form petals. Layer two or three tape patterns for a dimensional, collaged flower effect. Perfect for spring cards or Mother’s Day.
10. Edge Wrapping
Fold a strip of washi tape over the top or bottom edge of a card panel so that equal amounts appear on both the front and back. This creates a refined, bookmarked look that stands out in a pile of cards.
Washi Tape in Planners & Bullet Journals
Bullet journal and planner communities have taken washi tape to new heights. Its ability to be removed and repositioned makes it ideal for future planning spreads where things might change.

11. Tab Bookmarks
Fold a piece of washi tape over the edge of a page so that half extends beyond the page edge, forming a flag-style tab. Label it with a fine-tip pen. Skinny washi tapes are ideal for this — they won’t overwhelm the page margin.
12. Weekly Spread Dividers
Use washi tape to delineate each day of the week within your planner spread. A single strip of tape at the boundary between Monday and Tuesday instantly creates visual structure without the need for a ruler and pen.
13. Habit Tracker Grid
Build a habit tracker by running thin horizontal strips across the page for rows and vertical strips for columns. Use wider patterned tape for the header bar, then write in your habits with a ballpoint pen. The tracker takes about two minutes to set up and looks polished every time.
14. Journaling Prompts & Date Headers
Run a strip of washi tape across the top of a journal page and write your date or prompt directly on the tape. When you flip through the journal later, each entry’s strip creates a vivid timeline that’s both functional and beautiful.
Washi Tape for Gift Wrapping
Give your gifts an extra layer of personality without buying expensive ribbon or gift wrap. Washi tape is one of the easiest ways to make simple packaging look intentional and handmade.

15. Striped Gift Wrap Accents
Wrap a gift in plain kraft or solid-color paper, then add three to five parallel strips of coordinating washi tapes to create your own custom striped design. Mix foil tapes with matte ones for contrast and shine.
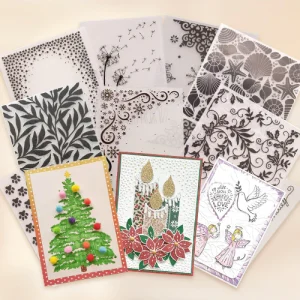
16. Decorated Gift Tags
Cover a plain gift tag with washi tape stripes or a patchwork pattern, then write the recipient’s name on top. A metallic Sakura Gelly Roll pen over patterned tape looks stunning. Try using Christmas or floral sets for seasonal gifting.
17. Envelope Seals
Forget the plain lick-and-seal. Close a handmade envelope with a decorative strip of washi tape across the flap. Use holographic or gold foil tape for a luxurious touch on thank-you notes and birthday cards.
Washi Tape for Home & Organization
Don’t keep your washi tape locked up in a craft drawer — bring it into everyday life. These ideas use tape in functional ways that also happen to look great.
18. Label Storage Containers
Stick a strip of washi tape to the side of a box, jar, or bin and write the contents with a permanent marker. Because washi tape removes cleanly from most surfaces, you can relabel as your storage needs change.
19. Personalize Stationery & Tools
Wrap washi tape around the barrel of a pen, the handles of scissors, or the spine of a notebook. It protects the item, makes it easy to identify in a shared workspace, and gives everyday tools a boutique feel.
20. Create Removable Wall Frames
Use four strips of washi tape to frame a photo directly on a wall, creating a gallery display that can be rearranged any time. Since washi tape doesn’t damage paint, this is a perfect solution for renters or anyone who loves to refresh their space.
Seasonal & Creative Washi Tape Ideas
Beyond the everyday crafts, washi tape has some genuinely unexpected uses that might surprise you.
21. Advent Calendar Seals
Use small squares of washi tape (numbered with a marker) to seal mini envelopes or bags for an advent calendar. Each day, the recipient tears the tape to reveal the surprise inside. Christmas foil sets are especially delightful here.
Pro Tip: For advent calendars, use a different tape pattern for each day. The variety makes the countdown feel even more festive, and it’s a great way to work through multiple rolls of a seasonal washi set.
22. Easter Egg Decorating
Wrap plastic or blown eggs with washi tape in various patterns and widths. It’s a clean, no-dye alternative that looks chic and minimal. Layer different tape widths for stripes or chevron effects.
23. Party Decorations
Deck out party cups, straws, and napkin rings with coordinating washi tape to create a cohesive table theme in minutes. Create banners by connecting pennants made from folded tape over string. No balloons required.
24. Washi Tape Bookmarks
Fold a piece of tape over a binder clip or a wooden craft stick, trim the edges neatly, and you have a custom bookmark. Make a set of these as small gifts or party favors — they take about 30 seconds each.
25. Polaroid-Style Photo Wall
Use washi tape corners (fold small squares diagonally into triangles) to mount photos on a wall or corkboard in Polaroid style. It’s removable, adjustable, and the tape patterns become part of the display aesthetic.
Essential Washi Tape Tips
Before you tear into your next roll, a few guidelines will help you get cleaner results and more consistent looks:
- Torn vs. cut edges: Tearing gives a soft, casual edge; scissors or a craft knife produces a sharp, clean line. Both have their place — use torn edges for organic, relaxed layouts and cut edges for structured, geometric work.
- Layer with purpose: Washi tape’s semi-transparency makes layering magical. Place a translucent floral tape over a solid color and the pattern shifts subtly — it’s like mixing paint without the mess.
- Test before you commit: On porous or delicate surfaces, test a small piece first. Most standard washi tapes remove cleanly, but extra-sticky varieties may leave a slight residue on certain papers.
- Use a tape dispenser: A washi tape holder or carousel keeps your collection visible and cuts down on unrolling chaos. Display tapes you use most often in a small wooden rack on your desk.
- Mix widths: Combining narrow border tapes with wide statement tapes in a single project adds visual rhythm without requiring multiple patterns.
- Write on tape: Most washi tapes accept ballpoint pen, gel ink, and fine-tip markers beautifully. Test felt-tip markers first — some bleed slightly on heavily wax-coated varieties.
Frequently Asked Questions About Washi Tape
Is washi tape permanent?
Generally, no. Washi tape is designed to be repositionable and removable from most smooth surfaces. On highly porous paper or textured surfaces, pressing firmly will make it more permanent, which is what you want for scrapbooking layouts you never plan to alter.
Can you write on washi tape?
Yes! Washi tape is one of the best surfaces for labeling because it accepts most pens. Ballpoint and medium-tip pens work best. Alcohol-based markers may bleed slightly on some varieties — always test on a scrap before writing something important.
How many rolls do I need to start?
A starter collection of 8–12 coordinating rolls in a mix of solid, patterned, and metallic gives you enough variety to try most techniques in this guide. Our curated tape sets are perfect for building a cohesive starter kit.
What is the difference between washi tape and regular masking tape?
Washi tape is made from Japanese rice paper and is thinner, more flexible, and available in decorative designs. The adhesive is gentler, making it repositionable without tearing surfaces. Regular masking tape uses a heavier crepe paper and stronger adhesive, and it’s not repositionable or decorative.
What are clear/transparent (PET) tapes vs. washi tapes?
Clear decorative tapes (also called PET or transparent tapes) are made from a thin film rather than paper. They are fully transparent, making them ideal for layering over photos or text. Washi tapes are paper-based and semi-transparent. Both are widely used in journaling and scrapbooking — they complement each other beautifully in the same layout.
Shop Our Washi Tape Collection
Ready to stock up? Browse our full selection of washi tapes, clear transparent tapes, and foil tape sets — all chosen for their quality, color range, and creative versatility. Whether you want bold botanicals, dreamy pastels, or shimmering metallics, we have something for every project style.


 New Arrivals
 Best Sellers
 All Product
 Latest deals